

Airveek field guide
Smartphone Case Detail Product Photo: Prove Fit at the Edges
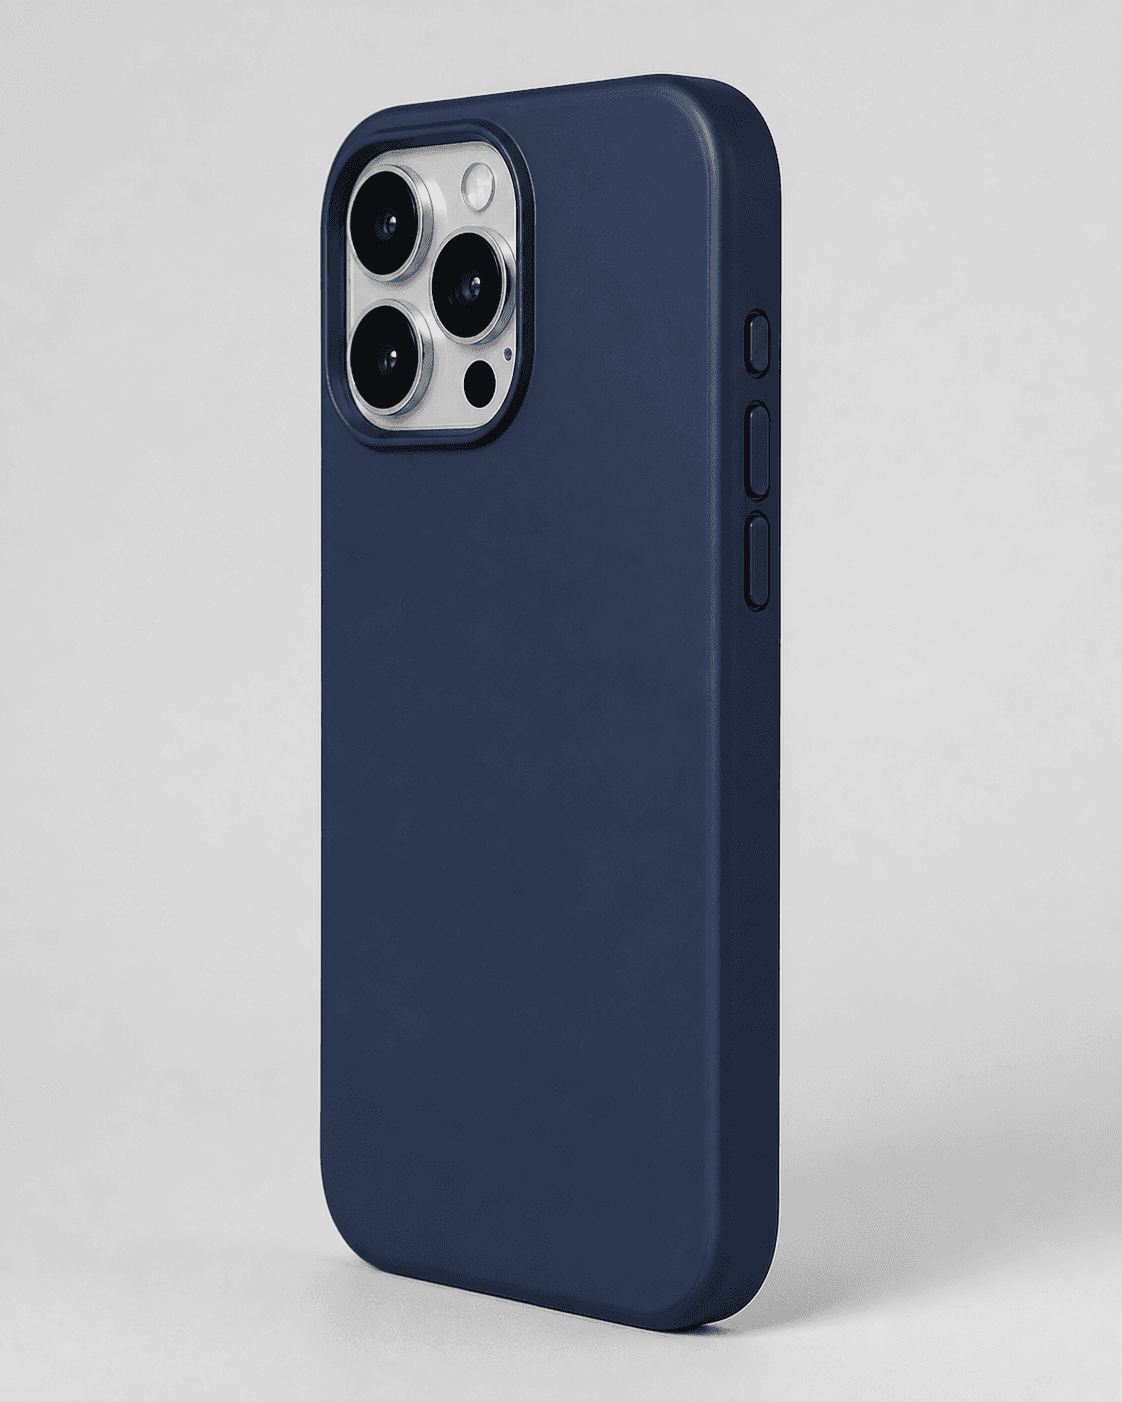
Use the supplied protective phone-case image as the identity reference, then build one close, square-safe detail frame that keeps the camera cutout, side buttons, bottom port, and edge thickness visible. In Airveek, choose product-scene, studio, and store-listing, apply only the supplied lowercase morrow wordmark with its two sparkle stars, and review the case at full size and mobile-thumbnail size before export.
Search task: smartphone case detail product photo
Written by LIKA
The buyer question
Which detail should this smartphone case product photo prove before a shopper buys?
Quick setup
- Goal
- Ecommerce product-detail image and mobile product-gallery thumbnail
- Output
- 1:1 square detail crop, Largest available export before destination-specific resizing
- Goal
- store-listing
- Mode
- product-scene
- Scene
- studio
Example Airveek result
How to create it
1. Upload the two supplied references
Add generic-phone-case.png as the product reference and public/images/morrow/morrow-logo.png as the second input. Use the case reference to preserve the rounded silhouette, dark navy appearance, rear camera opening, and three raised side buttons; use the logo reference only for the exact lowercase morrow mark with its two sparkle stars.
2. Choose the detail setup
In Airveek's product-fashion creator, set Mode to product-scene, Scene to studio, and Goal to store-listing. Run one detail job for one case rather than asking a listing frame to carry every proof point.
3. Paste the case-specific prompt
Ask for the camera cutout, side buttons, bottom port openings, and edge thickness in one close view. Keep the case dominant, use controlled light with a soft side highlight, and keep every proof area inside a square crop that remains readable on a mobile product grid.
4. Review before export
Compare the result with the supplied case reference at full size and at mobile-thumbnail size. Reject changed geometry or color, a shifted camera opening, hidden or invented ports, unreadable buttons, added text, an altered morrow mark, or an edge profile that disappears into glare. Export the largest available image, then resize to the destination's current specification only after the visual check.
Tested prompt
Use the supplied fictional MORROW logo reference (second input) as the product's only brand mark. Apply the exact lowercase wordmark "morrow" with its two sparkle stars naturally to the product label, package, or product surface; preserve the mark without inventing other words. Create one close-up ecommerce detail photo for one protective phone case. Keep the exact case shape, camera cutout, side buttons, ports, and visible color unchanged. Show the category-specific buyer details clearly: the camera cutout, side buttons, bottom port openings, and edge thickness. Use controlled commercial light with a soft side highlight so the edge profile reads without glare. Compose the case large but leave every proof area inside a square mobile crop. Do not invent any other readable text, dimensions, features, claims, extra products, watermarks, or retailer logos.Recorded settings
- Goal
- store-listing
- Mode
- product-scene
- Scene
- studio
Common problems and fixes
Problem:
Fix:
Problem:
Fix:
Problem:
Fix:
What to double-check
- The supplied reference is a generic visual anchor. It shows a dark navy case silhouette, rear camera opening, and raised side buttons, but it does not identify a specific phone model or verify fit, dimensions, material specification, or protection rating.
- A generated detail image can show visual alignment and visible openings; it cannot by itself prove drop protection, charging performance, MagSafe compatibility, water resistance, or any other product specification.
Why this works
The case's useful buying proof sits at its boundaries: the camera opening, side controls, port openings, and edge profile. A close three-quarter frame makes those areas inspectable without asking a clean listing image or a lifestyle scene to do two jobs at once. Keeping the case large and square-safe also gives the detail a chance to survive a small mobile thumbnail.
Before you export
- Use the exact supplied phone-case reference and the exact supplied morrow logo reference as the two inputs.
- Keep the case silhouette, visible color, camera opening, side buttons, materials, and labels consistent with the source.
- Make the camera cutout, side buttons, bottom port openings, and edge thickness visible in one close frame.
- Keep the case large enough for a mobile thumbnail and leave all proof areas inside a square crop.
- Reject invented text, claims, competing marks, altered geometry, a shifted camera opening, hidden ports, or glare that erases the edge profile.
- Confirm phone-model compatibility and all technical specifications from product data or testing separately before publishing or syndicating the image.
- Export the largest available image, then resize for the destination only after the full-size and mobile-thumbnail review.
Common questions
What should a smartphone case detail product photo show?
For this case, make the camera opening, side buttons, bottom port openings, and edge thickness the subject. Keep the product close and identifiable, use a clean background, and reserve lifestyle or hand scale for a separate image so the proof areas are not covered.
Can this detail image prove that the case fits a specific phone model?
Not by itself. The supplied reference can anchor visible geometry, but a generic image does not establish a particular model fit. Confirm the model and compatibility from product data or testing, then use the image to check whether the camera opening, buttons, and ports visually align with that verified variant.
Should I include a hand or a charger for scale?
Keep hands and props out of the main detail crop when they cover the camera opening, buttons, ports, or edge. If scale or use context matters, create a separate lifestyle or scale frame and keep this close-up focused on the case boundaries.
How do I keep the generated case consistent with the source?
Upload the same phone-case source and supplied morrow logo reference, repeat the identity constraints, and change only the detail composition. Compare the camera opening, side buttons, ports, edge, visible color, and mark against the source at full size and mobile-thumbnail size before accepting the result.
Further reading
- Airveek: All-in-One AI Image Generator — Airveek
- iPhone case cutout or no cutout discussion — Reddit r/iphone community discussion
- Which Case Did You Buy For Your iPhone? — MacRumors forum discussion
- Camera cutout alignment — Reddit community discussion
- Image SEO best practices — Google Search Central
- Image link | Google Merchant Center Help — Google Merchant Center Help
- The Complete Guide to Ecommerce Photography — Shopify
- Marketplace/category reference — Amazon marketplace reference