

Airveek field guide
Smartphone Case Product Photo Prompt for a Consistent Set
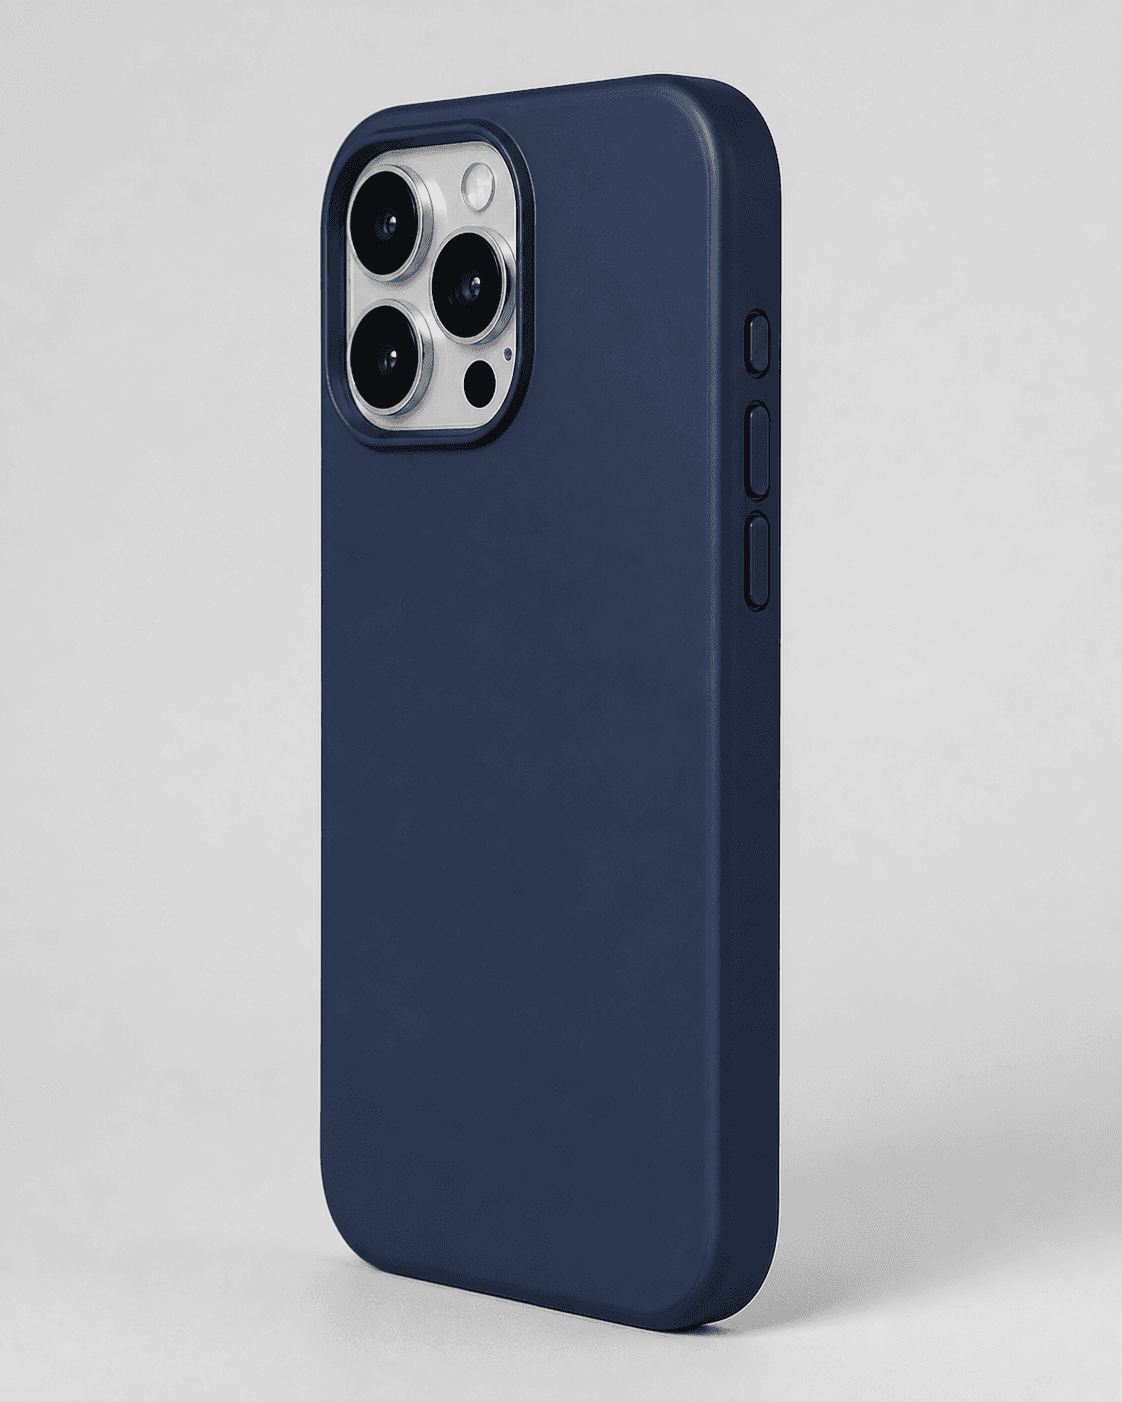
Use the supplied protective phone-case image as the identity reference and the supplied morrow logo as the second input. In Airveek, choose Product-scene, then run listing, lifestyle, and detail jobs with the prompt below. Keep the exact rounded silhouette, camera opening, three raised side buttons, and visible color consistent; review the fit cues, edges, and crop at full size and as a mobile thumbnail before export.
Search task: What tested Airveek prompt can I use to create a consistent smartphone case product-photo set?
Written by LIKA
The buyer question
What tested Airveek prompt can I use to create a consistent smartphone case product-photo set?
Quick setup
- Goal
- Ecommerce product-photo prompt and creator preset
- Output
- 1:1 square master, Destination-specific pixel and file size after current requirements are confirmed
- detail
- [object Object]
- listing
- [object Object]
- lifestyle
- [object Object]
Example Airveek result
How to create it
1. Add the two supplied references
Attach generic-phone-case.png as the product reference and public/images/morrow/morrow-logo.png as the second input. Use the case image to preserve the rounded dark navy silhouette, large rear camera opening, and three raised side buttons; use the logo image only for the exact lowercase morrow mark with its two sparkle stars.
2. Set the listing job first
In Airveek's product-fashion creator, choose Mode: product-scene, Scene: studio, and Goal: store-listing. Ask for one complete case on a quiet commercial background so the product is easy to identify before you add context or close detail.
3. Run lifestyle and detail as separate jobs
Switch to Scene: lifestyle and Goal: social-post for the restrained phone-in-hand scale view. For the close detail, return to Scene: studio and Goal: store-listing. Keep the same references and identity constraints, changing only the job's buyer question.
4. Paste the copyable prompt
Use the full prompt exactly, including the lowercase morrow wordmark, both sparkle stars, the one-case instruction, the three distinct jobs, and the no-invented-specifications limits. Save each job as its own labelled result rather than treating a collage as three final exports.
5. Check light, scale, and crop
Use soft, controlled commercial light that separates the dark case from the background without washing out the edge profile. Keep the hand out of the camera-opening and port proof areas, leave comfortable square crop space, and inspect the case at full size and as a small mobile thumbnail.
6. Compare before export
Compare every result with the supplied case reference and logo. Reject changed geometry or color, a shifted camera opening, missing or invented ports, unreadable buttons, altered mark placement, added text, or a crop that makes the case too small to identify. Confirm the destination's current file and pixel requirements before export.
Tested prompt
Use the supplied fictional morrow logo reference (second input) as the product's only brand mark. Apply the exact lowercase wordmark "morrow" with its two sparkle stars naturally to the product label, package, or product surface; preserve the mark without inventing other words. Create a coordinated product-photo set for one protective phone case: one clean listing frame with the complete case, one believable phone-in-hand lifestyle frame for scale, and one close detail frame for the rear camera opening, side buttons, bottom port openings, grip, and edge thickness. Keep the exact case silhouette, camera opening, three raised side buttons, visible color, and product identity unchanged across all three jobs. Use a neutral commercial studio background for listing and detail; use a restrained real-world setting for lifestyle, with the case dominant, unobscured, sharp, and square-crop safe. Do not add any other readable text, invented claims, phone-model names, dimensions, protection ratings, extra products, watermarks, retailer logos, or promotional overlays.Recorded settings
- detail
- [object Object]
- listing
- [object Object]
- lifestyle
- [object Object]
Common problems and fixes
Problem: The camera opening or side buttons drift from the supplied case reference.
Fix: Reattach the same case reference, repeat the geometry and visible-color constraints, simplify the angle, and reject any result whose opening or buttons no longer align visually with the source.
Problem: The hand-use frame covers the camera opening, ports, or edge.
Fix: Keep the hand as a small scale cue in the lifestyle job and move the fit proof into the separate studio detail job.
Problem: The detail frame looks polished but the case is too small at thumbnail size.
Fix: Remove props, move closer, keep soft edge separation, and reserve a square-safe crop so the camera opening, buttons, ports, and edge remain inspectable.
Problem: The mark becomes distorted or new readable text appears.
Fix: Use the supplied logo as the second input, repeat the exact lowercase morrow and two-sparkle instruction, and reject any output with altered mark geometry or added copy.
What to double-check
- The supplied case image is a visual anchor. It shows a dark navy rounded case, a large rear camera opening, and three raised side buttons, but it does not identify a specific phone model or verify fit, dimensions, material specification, or protection rating.
- A generated image can show visible alignment and openings; it cannot by itself prove model compatibility, drop protection, charging performance, grip, water resistance, or any other product specification.
- No matching generated case set is shown here. Run the three branded jobs and inspect every result against the supplied case reference and exact morrow mark before treating the set as final.
- Keep the square master until you confirm the destination's current image requirements; check the full-size image and the mobile thumbnail before resizing or syndicating it.
Why this works
A phone case has one identity but several buyer questions. Keeping the same case reference, exact morrow mark, visible color, and identity constraints across three separate jobs creates a consistent set; assigning one frame to identification, one to hand scale, and one to camera/port/edge inspection keeps each crop useful instead of making one busy image carry every proof point.
Before you export
- Use the same supplied phone-case reference and supplied morrow logo reference in all three jobs.
- Keep the rounded case silhouette, dark navy appearance, rear camera opening, three raised side buttons, visible color, and materials consistent with the source.
- Give listing, lifestyle, and detail images separate jobs so the case stays identifiable and the proof areas remain visible.
- Keep the exact lowercase morrow wordmark and its two sparkle stars as the only product mark; add no other readable brand copy.
- Inspect the camera opening, buttons, bottom ports, grip, edge thickness, logo placement, and crop at full size and mobile-thumbnail size.
- Confirm phone-model compatibility, dimensions, protection claims, charging behavior, and other specifications from product information or testing.
Common questions
Should I use one prompt for the listing, lifestyle, and detail images?
Keep the same case reference, morrow mark instruction, and identity constraints, but run the jobs separately. Use the listing frame for complete-product identification, the phone-in-hand frame for restrained scale, and the close frame for the camera opening, buttons, ports, grip, and edge. This keeps the set consistent without making one image do every job.
How do I show the camera cutout and ports without losing a clean product photo?
Keep the listing frame quiet and product-dominant, then use a separate close three-quarter detail job. Keep the camera opening, button treatment, bottom port openings, grip, and edge inside the crop, and keep a hand or prop out of those proof areas. Inspect the result at full size and as a small thumbnail before export.
Can this product photo prove that the case fits a specific phone model?
Not by itself. The supplied image can anchor visible shape and camera-opening alignment, but it does not identify a phone model or verify compatibility. Confirm the model, dimensions, materials, protection claims, and charging behavior from product information or testing, then use the image to check that the verified variant is represented accurately.
What crop and export should I check for mobile product grids?
Keep a clean 1:1 master, leave enough space around the case for responsive crops, and check the camera opening, buttons, ports, edge, and mark at both full size and mobile-thumbnail size. Confirm the destination's current pixel, file-size, and format requirements before resizing or syndicating the image.
Further reading
- Marketplace/category reference — Amazon marketplace reference
- Image link [image_link] - Google Merchant Center Help — Google Merchant Center Help
- Image SEO best practices — Google Search Central
- The Complete Guide to Ecommerce Photography — Shopify
- Phone Product Photography: How to Take Product Photos — Shopify
- Taking product photographs — Shopify Help Center
- Included Case Doesn't Fit — Reddit community discussion
- Airveek: All-in-One AI Image Generator — Airveek