

Airveek field guide
Smartphone Case Product Photography: Complete Airveek Workflow
Start with the supplied protective phone-case reference, then create three separate Airveek jobs: a clean listing frame for product identity, a believable lifestyle frame for hand scale and use, and a close-up for the camera cutout, buttons, ports, and edge thickness. Keep the exact silhouette, color, and supplied lowercase morrow mark consistent; review every result full-size and as a mobile thumbnail before export.
Search task: How do I plan a complete product-photo set for this smartphone case from one accurate source asset?
Written by LIKA
The buyer question
How do I plan a complete product-photo set for this smartphone case from one accurate source asset?
Quick setup
- Goal
- Ecommerce product-photo set and mobile product-gallery crops
- Output
- 1:1 square listing crop, Mobile-safe square lifestyle crop, 1:1 square detail crop, Largest available export before destination-specific resizing
- detail
- [object Object]
- listing
- [object Object]
- lifestyle
- [object Object]
Example Airveek result
How to create it
1. Upload the two supplied references
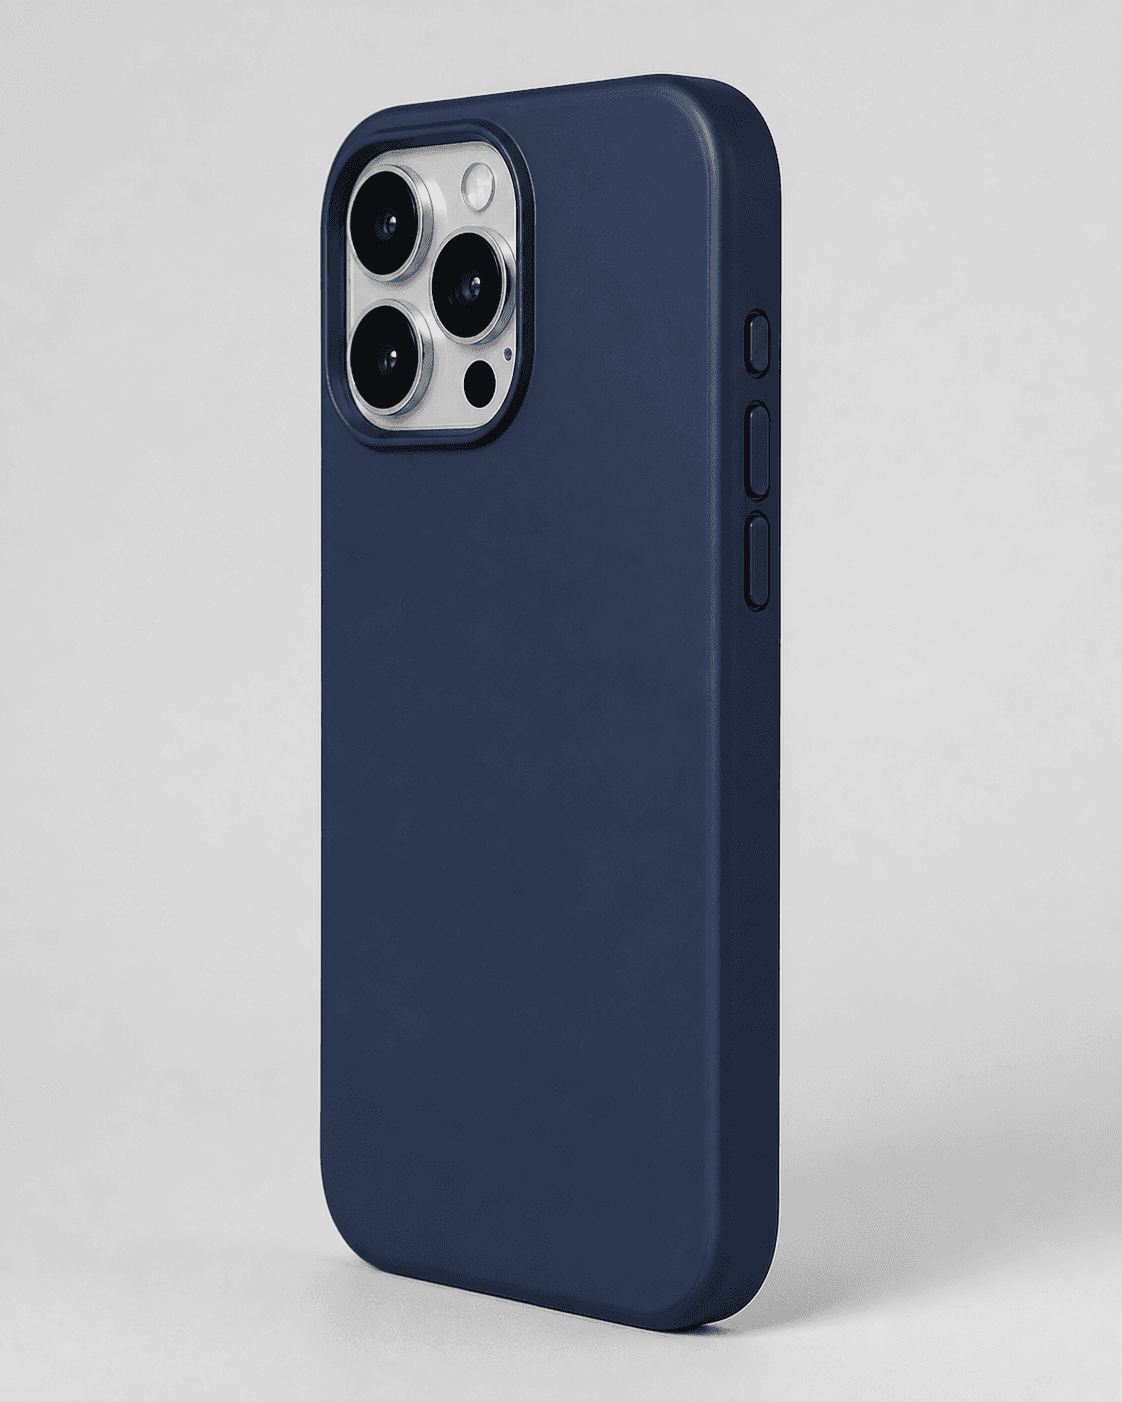
Add generic-phone-case.png as the product reference and public/images/morrow/morrow-logo.png as the second input. Use the case reference to preserve the rounded silhouette, dark navy appearance, rear camera opening, and three raised side buttons; use the logo reference only for the exact lowercase morrow mark with its two sparkle stars.
2. Create the clean listing frame
In Airveek's product-fashion creator, set Mode to product-scene, Scene to studio, and Goal to store-listing. Use the listing prompt for one complete case, a neutral background, and a product-dominant square-safe composition.
3. Create a separate lifestyle frame
Run a second job with Mode set to product-scene, Scene to lifestyle, and Goal to social-post. Add only enough context or hand scale to make use understandable; keep the case unobscured and leave the camera opening, buttons, and edge readable.
4. Create the edge-and-port detail frame
Run a third job with Mode set to product-scene, Scene to studio, and Goal to store-listing. Use controlled commercial light and a close three-quarter composition so the camera opening, side buttons, bottom ports, and edge thickness remain easy to inspect.
5. Compare every result with the source
Review the listing, lifestyle, and detail results at full size and as small mobile thumbnails. Check the case silhouette, visible color, camera opening, buttons, ports, edge profile, supplied morrow mark, crop, and readable text before selecting any output.
6. Export for the destination
Keep the largest available export after visual review, preserve a square-safe crop for each job, and resize only after confirming the destination's current image requirements.
Tested prompt
Use the supplied protective phone-case reference and the supplied fictional morrow logo reference as the only inputs. Create a coherent three-image product-photo set for one phone case: a clean studio listing image, a believable lifestyle image for hand scale and use, and a close-up detail image for the camera opening, side buttons, bottom ports, and edge thickness. Keep the exact case shape, camera cutout, buttons, ports, edge profile, and visible color unchanged. Apply only the exact lowercase wordmark "morrow" with its two sparkle stars; do not invent other readable text, claims, extra products, watermarks, retailer logos, or promotional overlays.Recorded settings
- detail
- [object Object]
- listing
- [object Object]
- lifestyle
- [object Object]
Common problems and fixes
Problem:
Fix:
Problem:
Fix:
Problem:
Fix:
Problem:
Fix:
What to double-check
- The supplied image anchors a visible dark navy case silhouette, rear camera opening, and raised side buttons; it does not identify a phone model or verify fit, dimensions, material specification, or protection rating.
- A generated image can show visible alignment and openings, but it cannot by itself prove compatibility, drop protection, charging performance, water resistance, or another product specification. Verify those separately.
- The supplied case reference is the visual anchor in this draft. Generate and visually review matching listing, lifestyle, and detail outputs before treating the complete set as final.
Why this works
A complete case set works when each image answers one decision quickly. The listing frame establishes the exact silhouette and camera opening; the lifestyle frame adds hand scale and everyday context; the detail frame enlarges the edges, side buttons, ports, and thickness. Keeping those jobs separate protects the product from clutter and gives each crop a clear role on a mobile gallery.
Before you export
- Use the exact supplied phone-case reference and the exact supplied morrow logo reference as the two inputs.
- Keep the case silhouette, visible color, camera opening, side buttons, materials, and labels consistent with the source.
- Give the listing, lifestyle, and detail images separate jobs so one crop does not have to prove everything.
- Keep the camera opening, buttons, bottom ports, and edge thickness visible in the detail frame.
- Make the case large enough for a mobile thumbnail and keep proof areas inside a square-safe crop.
- Reject invented text, claims, competing marks, altered geometry, shifted openings, hidden ports, or glare that erases the edge profile.
- Confirm phone-model compatibility and technical specifications from product data or testing separately before publishing or syndicating the image set.
- Export the largest available image, then resize for the destination only after the full-size and mobile-thumbnail review.
Common questions
Why create listing, lifestyle, and detail photos instead of one image?
They answer different shopper questions. The listing frame identifies the case, the lifestyle frame adds use and scale, and the detail frame lets a shopper inspect the camera opening, buttons, ports, and edge. Separate jobs also keep context from covering the product's decision details.
What should a smartphone case detail product photo show?
Make the camera opening, side buttons, bottom port openings, and edge thickness the subject. Keep the case close and identifiable, use controlled light, and leave hand scale or decorative context for a separate lifestyle frame so the proof areas stay visible.
Can a product image prove that this case fits a specific phone model?
Not by itself. The supplied image can anchor visible geometry, but it does not name a phone model or verify compatibility. Confirm the model and fit from product data or testing, then use the photo set to check whether the visible camera opening, buttons, ports, and edge align with that verified variant.
How do I keep all three case images consistent?
Upload the same case source to each job, repeat the visible identity constraints, and use the supplied exact lowercase morrow wordmark with its two sparkle stars as the only product mark. Compare the silhouette, color, camera opening, buttons, ports, edge, crop, and mark at full size and mobile-thumbnail size before selecting a result.
Further reading
- Marketplace/category reference — Amazon marketplace reference
- Platform image requirement — Google Merchant Center Help
- Shopify product photography workflow — Shopify