

Airveek field guide
Desk Lamp Detail Product Photo: Prove Light Direction
For an adjustable warm-light desk lamp, the detail to prove is light direction without losing the hinge, control area, stem, shade, or base. Use the supplied lamp as the identity reference, ask for a tight square close-up with soft side light and a visible pool of light on the desk, then check the crop at full size and as a mobile thumbnail. Treat brightness, wattage, dimensions, and adjustment range as separate specifications.
Search task: desk lamp detail product photo
Written by LIKA
The buyer question
Which detail should this desk lamp product photo prove before a shopper buys?
Quick setup
- Goal
- ecommerce product-page detail gallery
- Output
- 1024x1024
- Goal
- store-listing
- Mode
- product-scene
- Scene
- studio
Example Airveek result
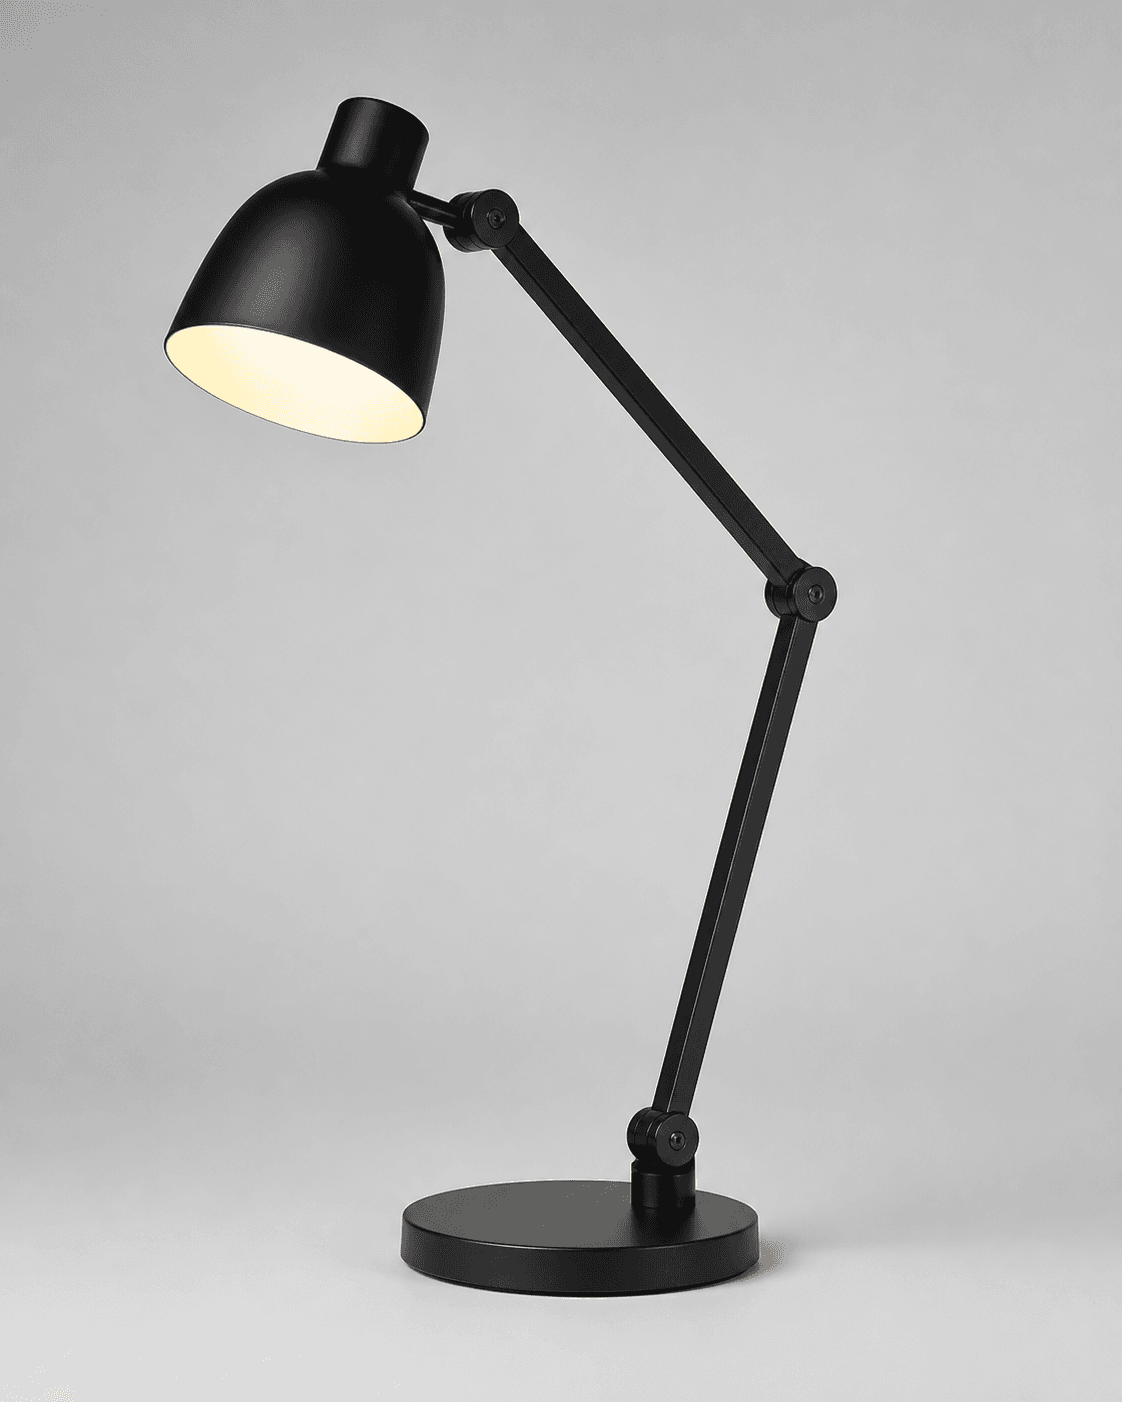
How to create it
1. Add the two supplied references
Use the adjustable desk-lamp reference as the identity anchor and add the supplied logo reference as the second input. Keep the lamp's black articulated silhouette, round base, shade, hinge joints, and visible control area consistent with the source.
2. Choose the detail workflow
In Airveek, choose Mode: product-scene, Scene: studio, and Goal: store-listing. This follows the existing real ECO10 recording and keeps the workflow focused on a clean product-page detail frame.
3. Compose for light direction
Use a close three-quarter view that keeps the shade-to-base relationship visible. Let a controlled warm pool fall on a small area of desk surface, while soft side light separates the hinge joints, stem, control area, and base from the neutral background.
4. Keep the supplied mark exact
For the fictional demo version, place the supplied lowercase morrow wordmark and both sparkle stars naturally on the lamp surface or package. Remove any other readable brand text rather than allowing the image to invent a label.
5. Review the detail before export
Compare the frame with the supplied lamp at full size and at a 240 x 240 mobile thumbnail. Confirm that the base, stem, shade, hinge joints, control area, light direction, and mark remain clear; then export the square detail frame at 1024x1024 for the documented gallery workflow.
Tested prompt
Use the supplied adjustable warm-light desk-lamp reference and the supplied fictional logo reference as the two inputs. For the branded demo version, apply the exact lowercase "morrow" wordmark with its two sparkle stars naturally to the product surface or package, and add no other readable brand text. Create one close-up ecommerce detail product photo for the lamp. Keep the exact black articulated shape, round base, stem, shade, hinge joints, visible control area, warm-lit interior, materials, and color unchanged. Use controlled soft side light with a gentle highlight on the joints and shade, a neutral warm-gray studio background, a tight square crop with mobile-safe margins, and a small patch of desk surface only when it helps prove light direction. Do not invent dimensions, controls, labels, features, claims, extra products, watermarks, retailer logos, promotional overlays, or a second lamp.Recorded settings
- Goal
- store-listing
- Mode
- product-scene
- Scene
- studio
Common problems and fixes
Problem: The warm-lit shade becomes a bright hotspot and the lamp body disappears.
Fix: Reduce the glow's visual intensity, keep soft fill on the lamp body, and recheck the shade edge, hinge joints, control area, and base at thumbnail size.
Problem: A full-product composition leaves the hinge or control area too small to inspect.
Fix: Use a closer square-safe crop with the lamp still recognizable, and let only a small desk patch provide the light-direction cue.
Problem: The branded demo version changes the supplied mark or adds readable copy.
Fix: Keep the supplied logo reference as the second input, preserve the exact lowercase morrow wordmark and two sparkle stars, and remove every other readable mark.
What to double-check
- The supplied source reference shows a black articulated lamp with a warm-lit shade, round base, stem, and visible hinge areas. Confirm every physical specification from the actual product information.
- The available ECO10 recording saved a three-variation set without the supplied logo input. It is used here to anchor the Airveek route and settings, while the supplied source remains the only displayed media; run the branded close-detail version separately before using a final export.
- Use this detail frame as a supporting gallery image. Pair it with a clean listing image for fast identification and a lifestyle image for desk context and scale, and check the destination's current image requirements before upload.
Why this works
The detail job answers one buyer question: where does the lamp send light, and can the visible adjustment area be inspected without guessing? A close three-quarter crop keeps the base, stem, shade, and hinge relationship intact while a small pool of warm light explains use. The clean listing and lifestyle jobs remain separate so this frame does not have to do every job at once.
Before you export
- The lamp remains one accurate product: round base, articulated stem, shade, hinge joints, visible control area, materials, and color match the supplied reference.
- The light direction reads through a restrained warm pool on the desk without washing out the shade or hiding the base and joints.
- The detail still reads at full size and at a 240 x 240 mobile thumbnail, with enough margin for the destination crop.
Common questions
What should a desk lamp detail product photo show?
Show the direction of the light while keeping the shade, stem, hinge joints, visible control area, and base easy to inspect. The close frame should preserve the lamp's shape and materials, not replace product specifications with a dramatic glow. Use a clean listing frame for fast identification and this detail frame for close inspection.
How do I photograph a lamp with the light turned on without losing detail?
Treat the glow as a directional cue, not the whole image. Keep the shade edge and lamp body exposed, use soft side light or fill to retain the hinge and base, and check the brightest area at small size. A public product-photography discussion raises the same glow-versus-body exposure problem; it is useful qualitative guidance, not a specification for this lamp.
Can this detail photo prove the lamp's brightness, wattage, or exact dimensions?
No. The image can show visible shape, light direction, finish, and the placement of the hinge or control area. Keep brightness, wattage, color temperature, dimensions, adjustment range, and electrical claims tied to the exact product information, and use the image for visual inspection only.
Further reading
- Image SEO Best Practices — Google Search Central
- How to photograph a light source, turned on? (table lamp) — Reddit r/productphotography community discussion
- How can I improve my product photos to a professional level? — Reddit r/productphotography community discussion
- Airveek: All-in-One AI Image Generator — Airveek
- Image link [image_link] - Google Merchant Center Help — Google Merchant Center Help
- The Complete Guide to Ecommerce Photography — Shopify
- Marketplace/category reference — Amazon marketplace reference