

Airveek field guide
Dog Harness Product Photography: A Complete Airveek Workflow
Start with one accurate dog-harness reference, then plan three separate Airveek jobs: a flat listing image for silhouette and product identity, a worn lifestyle image for fit context and scale, and a close detail image for straps, clips, adjustment points, and the leash ring. Keep the black harness unchanged, compare every result with the source, and keep the product large enough for a clean mobile crop.
Search task: dog harness product photography guide
Written by LIKA
The buyer question
How do I plan a complete product-photo set for this dog harness from one accurate source asset?
Quick setup
- Goal
- Ecommerce product-photo set with listing, lifestyle, and detail gallery crops
- Output
- 1:1 square listing master, 1:1 square lifestyle master, 1:1 square detail master, Largest available original before destination-specific resizing
- detail
- [object Object]
- listing
- [object Object]
- lifestyle
- [object Object]
Example Airveek result
How to create it
1. Upload the two supplied references
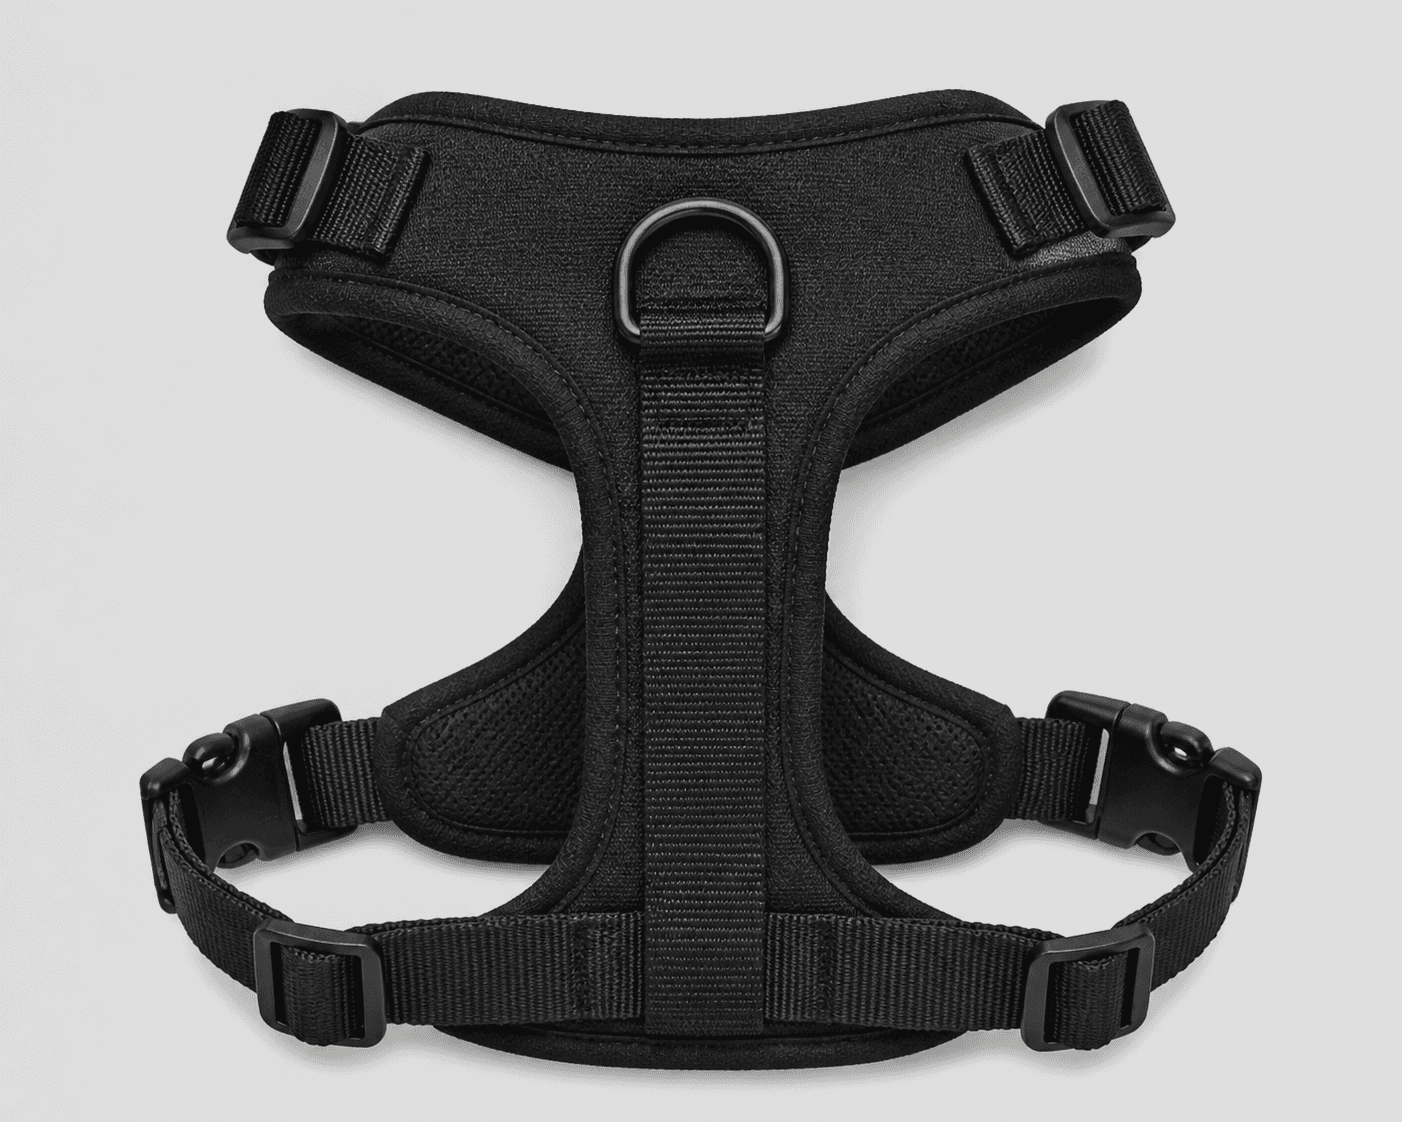
Add generic-dog-harness.png as the product reference and public/images/morrow/morrow-logo.png as the second input. Use the harness image to preserve the visible black silhouette, straps, buckles, adjustment points, leash ring, and surface details; use the logo reference only for the exact lowercase morrow wordmark with its two sparkle stars.
2. Create the clean listing frame
In Airveek's product-fashion creator, set Mode to product-scene, Scene to studio, and Goal to store-listing. Use the listing prompt for one complete harness on a neutral background, with the whole product centered and sharp enough for fast identification.
3. Create a separate worn-use frame
Run a second job with Mode set to product-scene, Scene to lifestyle, and Goal to social-post. Use a calm park-path setting and a natural dog stance to give context and apparent scale, but keep the harness dominant and unobscured. Do not let the scene imply a universal fit.
4. Create the strap-and-clip detail frame
Run a third job with Mode set to product-scene, Scene to studio, and Goal to store-listing. Use controlled light and a close crop so the adjustment points, clips, strap routing, surface texture, and leash ring remain easy to inspect.
5. Compare every result with the source
Review the listing, lifestyle, and detail results at full size and as small mobile thumbnails. Check the harness silhouette, visible black color, strap count and routing, buckles, adjustment points, leash ring, logo mark, crop, and readable text before selecting an output.
6. Export for the destination
Keep one square master for each job, preserve the largest clean original, and create destination-specific crops only after checking the current marketplace or storefront image rules. Do not enlarge a thumbnail, add overlays, or use a crop that hides a fit point.
Tested prompt
Use the supplied fictional morrow logo reference as the product's only brand mark. Apply the exact lowercase wordmark "morrow" with its two sparkle stars naturally to a product label, package, or product surface; preserve the mark without inventing other words. Create a complete ecommerce product-photo set for one adjustable dog walking harness using three separate jobs: a clean studio listing image for product identity, a believable lifestyle image with the harness worn by a dog for context and apparent scale, and a close detail image for the straps, buckles, adjustment points, and leash ring. Keep the exact harness shape, visible black color, straps, buckles, leash ring, and materials unchanged. Use clean commercial lighting, restrained styling, square-safe composition, and sharp buyer-visible detail. Do not add any other readable text, invented dimensions, fit or safety claims, extra products, duplicate harnesses, watermarks, retailer logos, or promotional overlays.Recorded settings
- detail
- [object Object]
- listing
- [object Object]
- lifestyle
- [object Object]
Common problems and fixes
Problem: The lifestyle frame hides the buckles, adjustment points, or leash ring under fur, a leash, or a prop.
Fix: Move to a clean side or three-quarter angle, simplify the scene, brighten the harness edge, and keep the proof areas inside the mobile-safe crop.
Problem: The detail frame changes the harness silhouette, strap routing, visible black color, or hardware.
Fix: Reuse the supplied harness reference, repeat the identity constraints, pull back slightly, and compare the result with the source before selecting it.
Problem: The listing crop makes the harness too small or cuts off the lower strap loop.
Fix: Center the entire harness on a neutral background, reduce empty space without touching the edges, and recheck the square crop at thumbnail size.
Problem: The branded version adds extra words or changes the supplied mark.
Fix: Use the supplied morrow logo reference as the only brand input, preserve the exact lowercase wordmark and two sparkle stars, and reject any result with invented readable copy.
What to double-check
- The supplied image establishes visible harness geometry, black appearance, straps, buckles, adjustment points, leash ring, and surface detail; it does not establish size range, comfort, pull strength, safety performance, or fit for a particular dog.
- A worn-use image can show context and apparent scale, but it cannot prove a universal fit. Confirm sizing and fitting instructions from the actual product information.
- The source image is the visual anchor in this guide. Create and review fresh listing, lifestyle, and detail results from the supplied harness and morrow references before using the generated set in a storefront.
- Keep the largest original and confirm the destination's current image requirements before resizing or syndicating the set.
Why this works
A complete harness set works when each image answers a different buyer question. The listing frame establishes the exact silhouette and hardware; the lifestyle frame shows how the harness reads on a dog and gives apparent scale; the detail frame enlarges the straps, clips, adjustment points, and leash ring. Keeping those jobs separate protects the product from clutter and prevents a worn scene from carrying claims it cannot prove.
Before you export
- Use the same supplied harness reference in all three jobs and preserve its visible black silhouette, strap routing, buckles, adjustment points, leash ring, and materials.
- Keep the listing image clean, centered, product-dominant, and legible at a small mobile thumbnail.
- Use the lifestyle image for a believable dog-wearing context and apparent scale without hiding the harness or implying universal fit.
- Use the detail image to show the straps, clips, adjustment points, stitching, surface texture, and leash ring with controlled light.
- Preserve the exact lowercase morrow wordmark and its two sparkle stars when using the supplied brand reference, with no other readable copy.
- Compare all three results at full size and thumbnail size, then export square masters from the largest clean originals without enlarging a thumbnail.
Common questions
What belongs in a complete dog harness product-photo set?
Use three complementary jobs: a clean flat or studio frame for product identity, a worn lifestyle frame for context and apparent scale, and a close detail frame for straps, clips, adjustment points, and the leash ring. Separate jobs let each image stay readable instead of forcing every proof point into one busy crop.
How do I show harness fit points without promising a universal fit?
Show the harness worn by a dog for context, then use the flat and close views to keep the strap routing, buckles, adjustment points, and leash ring clear. Describe only what the image shows. Check the actual size guide and fitting instructions separately, because one worn view cannot establish fit for every dog.
What should a close dog harness detail photo show?
Make the decision detail the subject: the webbing and its routing, each visible clip or buckle, the adjustment points, stitching or surface texture that is actually visible, and the leash ring. Use controlled light and a close crop, while keeping the product geometry and color consistent with the source.
Can a dog harness photo prove size, comfort, or safety?
No. The photo can show visible construction, context, and apparent scale, but it cannot establish a size range, comfort, pull strength, safety performance, or suitability for a particular dog. Verify those claims from the exact product information and use the photo set to make the visible fit points easier to understand.
How should I export a dog harness image set for a marketplace or store?
Keep the largest clean original, make one square master per job, and resize only after checking the destination's current requirements. Use the clean product view for the main listing role, keep the correct product variant visible, and avoid thumbnails, borders, watermarks, promotional overlays, or crops that hide the harness.
Further reading
- Photography Workflow: How to Plan, Shoot, and Edit — Shopify
- Phone Product Photography: How to Take Product Photos — Shopify
- How do I properly photograph complex products like a dog harness? — Reddit r/productphotography
- Marketplace/category reference — Amazon marketplace reference
- Image link [image_link] - Google Merchant Center Help — Google Merchant Center Help
- Shopify product photography workflow — Shopify