

Airveek field guide
Baby Bottle Product Photography Guide: Plan a Complete Airveek Set
Start with the supplied wide-neck baby feeding bottle reference, then plan three separate Airveek jobs: a clean listing frame for quick identification, a quiet held-use or nursery context frame for scale, and a close detail for the wide neck, cap, nipple, and visible part relationship. Keep the clear bottle body and white parts readable with soft controlled light, preserve the exact product shape and supplied lowercase morrow mark when branding is shown, and review each crop at full size and mobile-thumbnail size before export.
Search task: baby bottle product photography guide
Written by LIKA
The buyer question
How do I plan a complete product-photo set for this baby bottle from one accurate source asset?
Quick setup
- Goal
- Ecommerce product-page gallery and mobile product-card crops
- Output
- 1:1 square listing master, 4:5 portrait lifestyle crop, 1:1 square detail master, 240 × 240 mobile-thumbnail check, Largest useful export before destination-specific resizing
- Mode
- product-scene
- Detail goal
- store-listing
- Detail scene
- studio
- Listing goal
- store-listing
- Listing scene
- studio
- Lifestyle goal
- social-post
- Lifestyle scene
- lifestyle
Example Airveek result
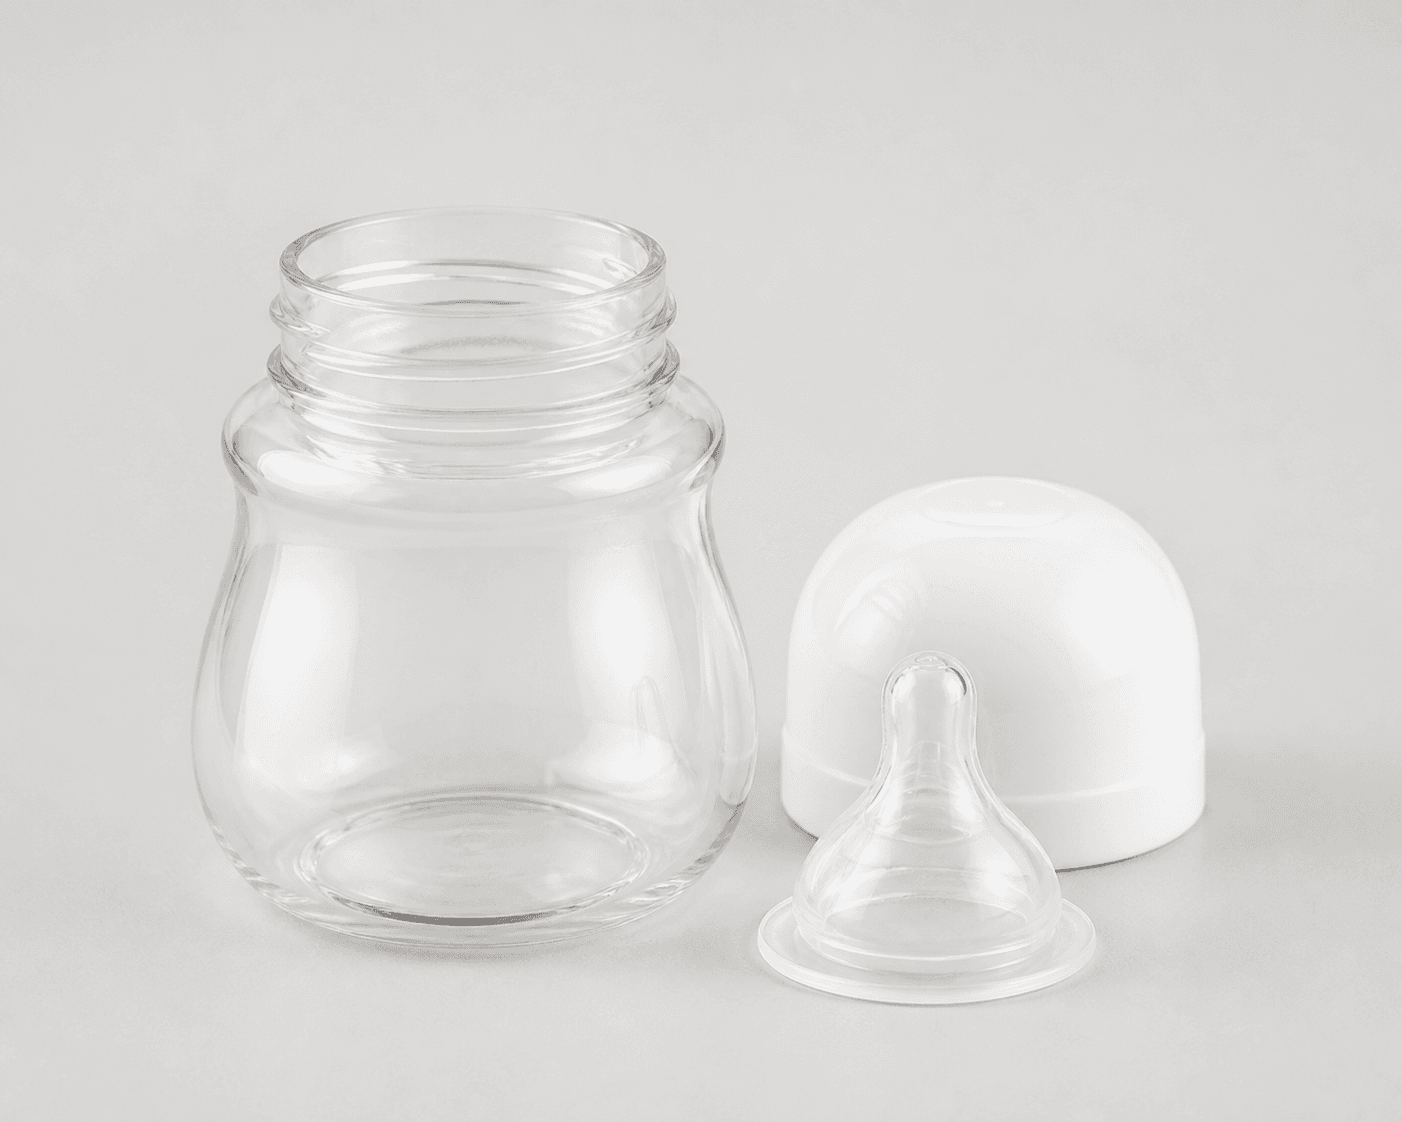
How to create it
1. Define the three buyer questions
Plan one clean listing frame for fast whole-product identification, one lifestyle frame for believable context and relative scale, and one close detail frame for the wide neck, cap, nipple, and visible part relationship. Do not make one image carry every job.
2. Start from one accurate reference
Upload the supplied bottle reference and keep it beside the workspace while you build all three jobs. Match the clear bottle body, open wide threaded neck, white rounded cap, clear nipple, detached parts, finish, and visible relationships to this reference.
3. Add the supplied demo mark when needed
When the fictional demo brand is shown, add the supplied logo reference as the second input. Keep the exact lowercase morrow wordmark with both sparkle stars together on the product surface or a small package element, and add no other readable brand text.
4. Run the clean listing job
In Airveek's product-fashion creator, set Mode to product-scene, Scene to studio, and Goal to store-listing. Keep one complete bottle dominant on a quiet background; arrange the cap, nipple, and any shown parts nearby without overlap so the product reads quickly.
5. Run the lifestyle and scale job
Run a separate job with Mode set to product-scene, Scene to lifestyle, and Goal to social-post. Use one restrained caregiver hand or unmarked nursery surface as a scale cue, keep it secondary, and use soft diffused light so the bottle body, neck, cap, nipple, and shown parts remain legible.
6. Run the cap-and-nipple detail job
Run a third job with Mode set to product-scene, Scene to studio, and Goal to store-listing. Use a close three-quarter composition that makes the cap, nipple, neck interface, and visible part relationship easy to inspect while retaining enough bottle body to confirm the same product.
7. Compare every result with the source
Review the three jobs separately against the supplied reference. Reject changed geometry, missing or duplicated parts, disappearing transparent edges, harsh glare, invented text, altered branding, or a crop that hides the proof area. Keep context, close inspection, and product identification in their assigned frames.
8. Check mobile crops before export
Inspect the listing and detail jobs in a centered 1:1 crop, the lifestyle job in 4:5 and 1:1 crops, and all three at 240 × 240. Keep the largest useful clean export until the destination's current image and format requirements are confirmed.
Tested prompt
Use the supplied wide-neck baby feeding bottle reference and the supplied fictional logo reference as the only inputs. If the fictional demo brand is shown, apply the exact lowercase wordmark "morrow" with its two sparkle stars naturally to the product surface or a small package element; preserve the supplied mark and add no other readable brand text. Create a coherent three-image ecommerce product-photo set from three separate jobs: one clean listing image for fast product identification, one quiet held-use or nursery lifestyle image for relative scale and context, and one close detail image for the wide threaded neck, white cap, clear nipple, and visible part relationship. Keep the clear bottle body, white rounded cap, clear nipple, and any detached parts shown in the reference unchanged. Keep the product dominant, use controlled light that separates clear edges and white surfaces, leave square-safe margin, and check each crop at full size and 240 × 240. Do not add a baby, feeding liquid, duplicate bottles, invented dimensions, capacity, material, age, flow-rate, cleaning, health, safety, performance, or promotional claims, watermarks, retailer logos, or promotional overlays.Recorded settings
- Mode
- product-scene
- Detail goal
- store-listing
- Detail scene
- studio
- Listing goal
- store-listing
- Listing scene
- studio
- Lifestyle goal
- social-post
- Lifestyle scene
- lifestyle
Common problems and fixes
Problem: The bottle body, clear nipple, or white cap disappears into the pale background.
Fix: Use a warmer or slightly darker neutral background, broaden the light source, and add gentle edge separation without changing the bottle's visible color or finish. Recheck the clear and white parts at thumbnail size.
Problem: The lifestyle hand or nursery props hide the bottle's neck, cap, nipple, or visible parts.
Fix: Reduce the scene to one quiet scale cue, move it behind or beside the bottle, and keep the bottle body facing the camera. Reserve close inspection for the detail job.
Problem: The cap, nipple, or neck interface is too small to inspect.
Fix: Use the separate close three-quarter detail job, bring the parts into the center-safe area, and pull back enough to keep the proof area inside the square crop.
Problem: Glare makes the transparent bottle body or nipple unreadable.
Fix: Use a larger diffused light source, soften hard reflections, and keep a controlled edge highlight that describes the product instead of washing over it.
Problem: A generated result changes the bottle shape, finish, color, visible parts, or supplied mark.
Fix: Compare it with the supplied reference, repeat the identity constraints and exact lowercase morrow mark, and reject the changed result.
Problem: The set implies capacity, age guidance, feeding outcomes, or safety performance it cannot prove.
Fix: Remove rulers, badges, liquid, and unsupported copy. Keep exact dimensions, included parts, instructions, and safety information in verified product documentation.
What to double-check
- The supplied reference shows visible shape and part relationships only: a clear bottle body, open wide threaded neck, white rounded cap, clear nipple, and detached parts. It does not establish capacity, dimensions, material composition, flow rate, age guidance, cleaning method, included-pack count, or safety performance.
- A product photo can show visible appearance, part relationships, context, and apparent scale. It cannot prove feeding outcomes, leak performance, safety, exact dimensions, or specifications that are not visible.
- The available Airveek capture is incomplete, so this guide does not present a generated listing, lifestyle, or detail result. Create and inspect a fresh result before using generated media in a gallery or campaign.
- Keep the three jobs separate: use the listing frame for identification, the lifestyle frame for context and relative scale, and the detail frame for the cap, nipple, and wide-neck inspection.
Why this works
A complete product-photo set is easier to judge when each frame has one job. The clean listing view makes the bottle and visible parts identifiable, the lifestyle view adds a restrained context and scale cue, and the detail view enlarges the wide neck, cap, nipple, and part relationship. Reusing one source reference across all three jobs helps preserve the same visible product identity while lighting, composition, and crop change for the buyer question each image needs to answer.
Before you export
- Compare every result with the supplied reference: bottle body, open wide threaded neck, white rounded cap, clear nipple, detached parts, finish, color, and visible relationships should stay consistent.
- Keep one complete bottle dominant and unobscured in each job; use one quiet scale cue in the lifestyle frame and keep it secondary.
- Inspect the listing and detail frames in a centered 1:1 crop, the lifestyle frame in 4:5 and 1:1 crops, and all three at 240 × 240.
- Use soft broad light and gentle fill so the clear body, clear nipple, and white cap separate from the background without glare washing over them.
- When branding is shown, use the supplied exact lowercase morrow wordmark with its two sparkle stars and no other readable brand copy.
- Verify capacity, dimensions, materials, included parts, cleaning, feeding, and safety information from product documentation rather than from the image.
Common questions
What belongs in a complete baby bottle product-photo set?
Use three complementary jobs: a clean listing frame for quick product identification, a quiet lifestyle frame for context and relative scale, and a close detail frame for the wide neck, cap, nipple, and visible part relationship. Keeping them separate lets each image answer one shopper question without hiding the product details another frame needs to show.
Should the listing image show the cap and nipple beside the bottle?
If those parts are shown in the supplied reference, arrange them near the complete bottle so the visible set is easy to understand without overlapping the hero. Keep the bottle dominant, then use the separate detail frame when the cap, nipple, or neck interface needs closer inspection.
How do I keep the three baby bottle images consistent?
Use the same source reference for every job and repeat the visible identity constraints: clear bottle body, open wide threaded neck, white rounded cap, clear nipple, detached parts, finish, color, and part relationship. Change the setting or crop for the job, not the product. Compare the full-size images and mobile crops side by side before export.
Can a baby bottle product photo prove capacity, material, or safety?
No. The image can show visible shape, finish, color, and part relationships, but capacity, dimensions, material composition, flow rate, cleaning instructions, feeding outcomes, and safety information need verified product information for the exact bottle shown.
Where should the morrow mark appear in the demo set?
When the fictional demo brand is shown, use the supplied logo reference on the product surface or a small package element as the only mark. Keep the exact lowercase morrow wordmark and both sparkle stars together, and add no other readable brand copy or floating watermark.
Further reading
- Marketplace/category reference — Amazon marketplace reference
- Image link [image_link] - Google Merchant Center Help — Google Merchant Center Help
- The Complete Guide to Ecommerce Photography — Shopify